Open source intelligence
Open source intelligence is collecting information from publicly available resources. If you are doing incident handling it’s one of the things that will use up a lot of your time. And it can quickly become very tedious. Imagine a list of IPs that you found hosts on your network connecting to. Query different public available resources (VirusTotal, Shodan, SANS, Cymon, XForce Exchange, …) for each and every IP and then converting that data into one uniform dataset is time-consuming.
I started developing my own tool (host-enrich on Github) for collecting this type of information but by coincidence I stumbled on a tool that had almost everything that I needed.
Enters SpiderFoot.
SpiderFoot
SpiderFoot automates open source intelligence. It’s a modular platform written in Python that gathers data from different sources and presents the data visually and allows for exporting data.
This post describes the use of SpiderFoot with a focus on gathering passive reconnaissance data and getting the data in an easy accessible (CSV) format.
It is important to note that this post is based on the changes that I commited to my fork of SpiderFoot. Not all changes have yet been committed as pull requests. Pending the pull requests I advice you to use the source in my Github fork at https://github.com/cudeso/spiderfoot.
The default source is available on Github. The installation and setup is described in detail in the online documentation.
Get started with SpiderFoot
Once downloaded and extracted you can start SpiderFoot easily with
./sf.py 192.168.168.1:5001
This commands has it running on port 5001 on the IP 192.168.168.1.
I you start SpiderFoot you should immediately head to the Settings tab. The left part of your screen will list the available modules. If you already have API keys then this is a good time to add them. For example the modules for Cymon, Shodan and VirusTotal require an API key. Add your keys and click Save Changes.
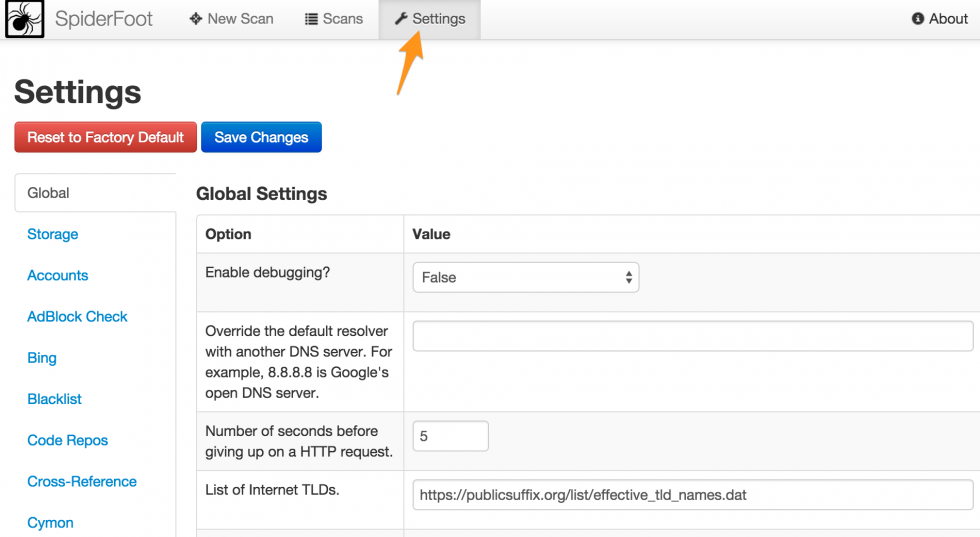
None of this data is sent outside of your network. Everything is stored locally in a sqlite database.
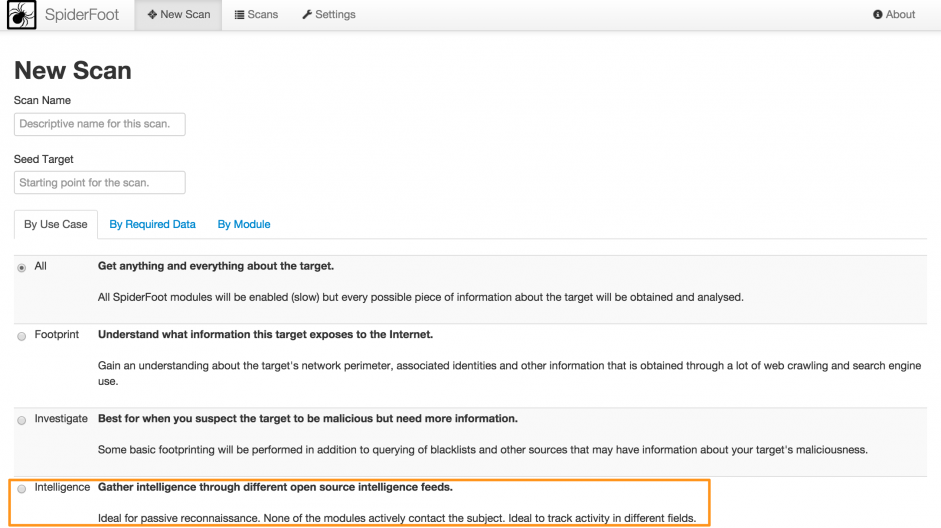
The next thing you want to do is start a New Scan. I advise you to use the Intelligence use case (note that this is one of the code changes that I added). Enter a descriptive scan name, a scan target and click Run Scan. For this post you can use the IP 211.202.2.97 as an example.
You’ll get visual feedback on the scan progress. Further details on the scan progress can be found in the log section.
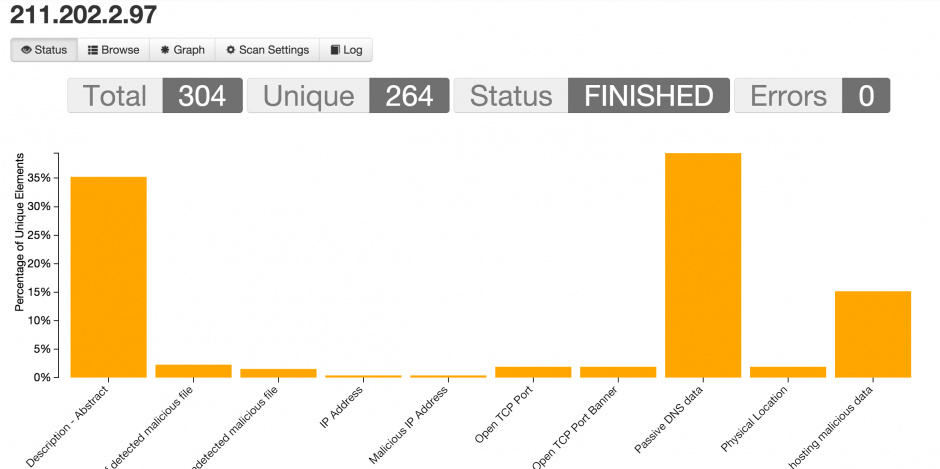
Once the scan is finished you get an overview of all the elements that have been found.
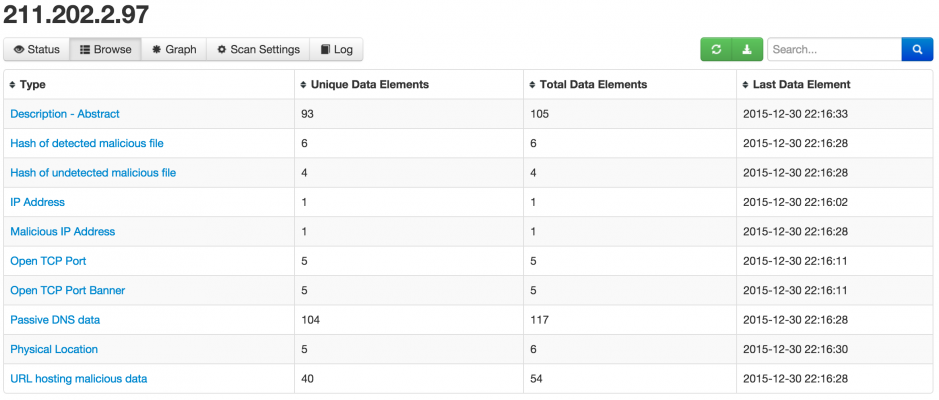
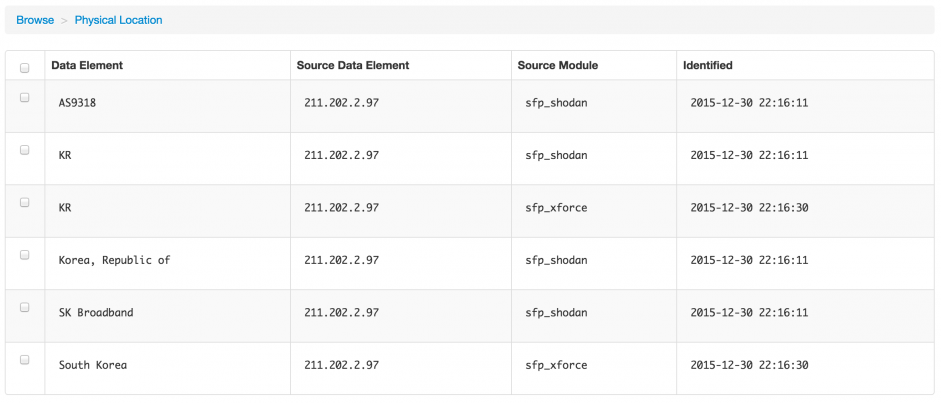
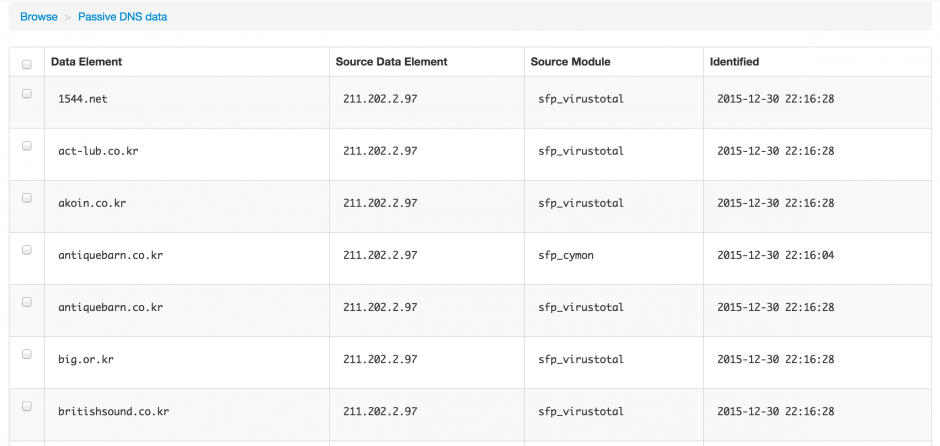
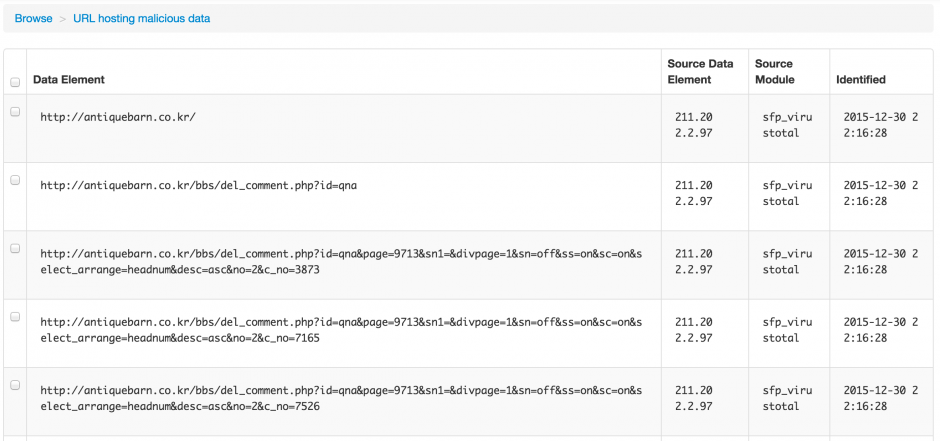
You can also drill down on the data that was found and get for example the physical location, the passive dns data records or the URLs that were hosting malicious data
As a last step you can now export the data, either globally or per item found.

Passive reconnaissance with SpiderFoot
Passive reconnaissance is an attempt to gain information about targeted computers and networks without actively engaging with the system. When you are dealing with “malicious” IPs or domains this is very important. Contacting an IP (especially when you’re not using a proxied-connection, see below for proxy integration) that is involved with malicious activity on your network is basically giving away you found out about its presence. This is something that you should avoid.
SpiderFoot comes with use cases. I added a use case Intelligence that groups all modules that do passive reconnaissance, solely relying on third party public sources. Of course, nothing prevents the bad-guys from monitoring the use of these sources but that’s another issue.
You can easily add or remove modules from this use case by changing the sourcecode. A module is added to a use case via a comment setting in the class definition. For example the VirusTotal module this is set to
"""VirusTotal:Investigate,Intelligence:Obtain information from VirusTotal about identified IP addresses."""
This means that the VirusTotal module is used in the use cases Investigate and Intelligence. Finding out which modules are included in the Intelligence use case can be done via
fgrep -R Intelligence modules/*
modules/sfp_cymon.py:    """Cymon:Investigate,Intelligence:Obtain information from Cymon, a tracker of open-source security reports."""
modules/sfp_sansisc.py:    """SANS_ISC:Investigate,Intelligence:Obtain information from SANS ISC about identified IP addresses."""
...
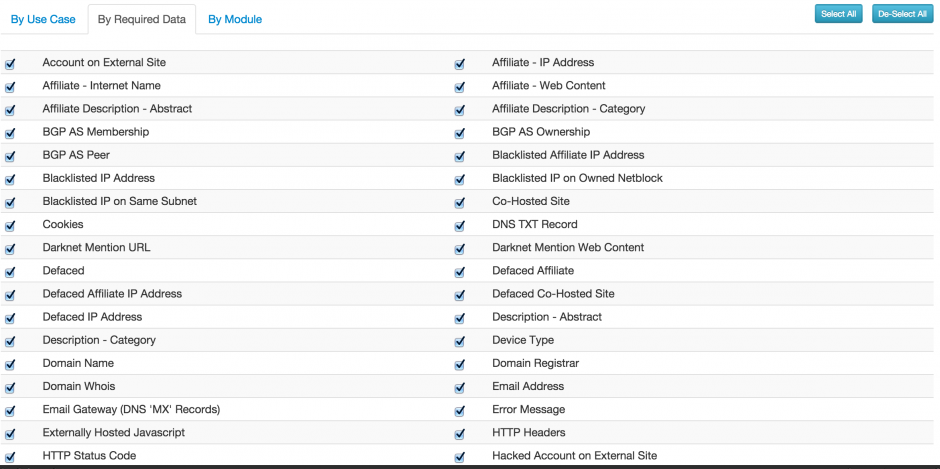
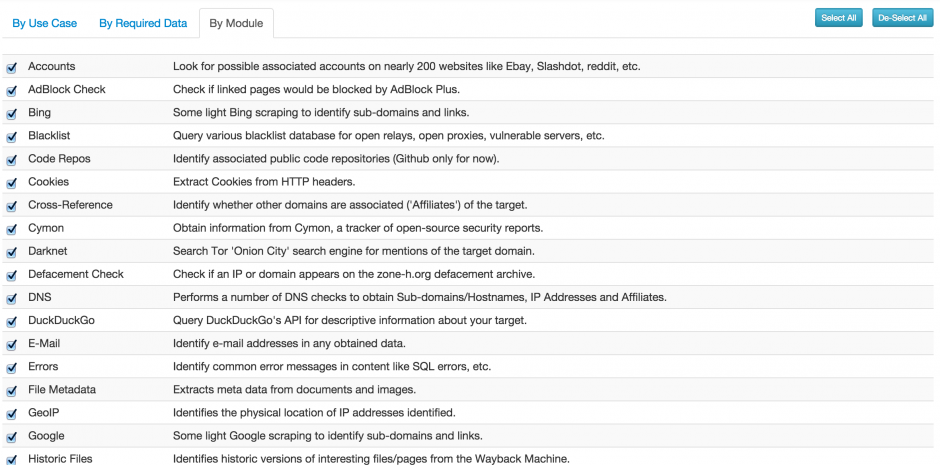
Searching for specific intelligence
Next to performing a search by use case you can also search for a specific type of data with the “By Required Data” or “By Module” search. These become more useful if you know exactly what type of information you are looking for. Remember that some of the modules will interact with the search subject.
Command line interface
The web interface of SpiderFoot is great but sometimes a command line interface is easier when dealing with large sets of scans or if you want to use SpiderFoot for automation.
I included in my code fork a command line script to interact with SpiderFoot. It is very basic and primary focused on using the Intelligence use case.
You can start the script with
/sf_cli.py myScan 211.202.2.97
This will launch a scan named ‘myScan’ for intelligence data on the given IP. The output is a CSV-formatted set of data.
myScan,2015-12-30 21:18:13,URL_MALICIOUS,sfp_cymon,211.202.2.97,0,http://zenocompany.com/catalog/images/alexis.php
myScan,2015-12-30 21:18:13,URL_MALICIOUS,sfp_cymon,211.202.2.97,0,http://zenocompany.com/pshop/news_skin/file.php
myScan,2015-12-30 21:18:13,GEOINFO,sfp_sansisc,211.202.2.97,0,ip-adm@hanaro.com
myScan,2015-12-30 21:18:13,DNS_PASSIVE,sfp_cymon,211.202.2.97,0,jsoft21.co.kr
myScan,2015-12-30 21:18:13,DNS_PASSIVE,sfp_cymon,211.202.2.97,0,mdasj.co.kr
myScan,2015-12-30 21:18:13,DNS_PASSIVE,sfp_cymon,211.202.2.97,0,redbrick.co.kr
The configuration of the script is inline. Change the csf_host and sf_port for your configuration.
csf_host = "192.168.171.159"
sf_port = "5001"
sf_usecase = "Intelligence"
verbose = False
The script submits the scan requests, waits 10 seconds (set in the variable time_sleep) for the scan to finish and then returns a CSV output.
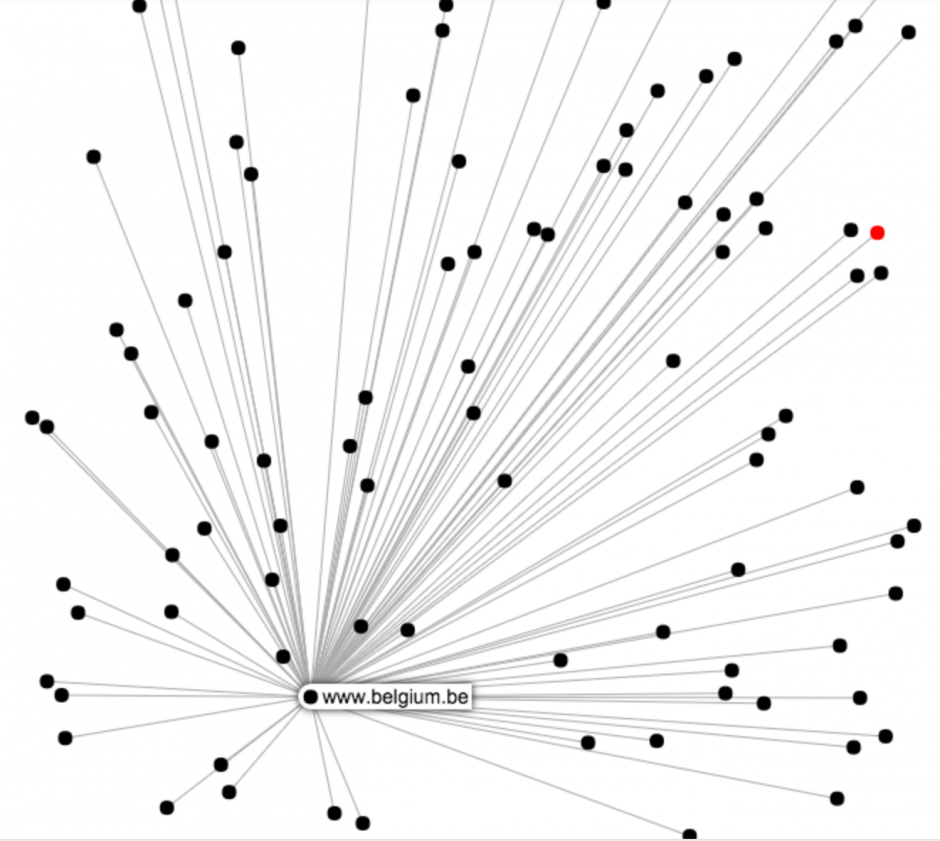
Visual representation
SpiderFoot also supports the visual representation of the data that has been found. I’ve not used this a lot but for some purposes this can give you an immediate overview of how the different data elements are inter-connected.
Proxy integration
If you plan on query your search subject directly I strongly advice you to use some sort of proxy that routes your traffic through an “anonymous” network. SpiderFoot has build-in integration for Tor (see the Settings page). Alternatively you can also use a proxy and export your session to use a designated proxy.
Future integration
SpiderFoot will see a lot of future development. One of my future ideas is to develop an interface with MISP, Malware Information Sharing Platform & Threat Sharing. I wrote about MISP before in three posts (Getting started with MISP, Malware Information Sharing Platform & Threat Sharing). The basic idea would be to
- Query a MISP instance for a subject, return the info found in MISP for that subject;
- Enrich a MISP event with data found for a given subject.
Next to the MISP integration it would also be great to export the SpiderFoot data immediately to Elasticsearch. That way I would be able to interconnect them with the data found in honeypots or enrich it with Twitter data (Tweetsniff).
Additionally, besides MISP, I’d also like to have SpiderFoot talk to a nfdump-nfsen sensor (alerts from nfsen, automatically investigate the remote side of the connection).
Conclusion
SpiderFoot is a tool that saves me a lot of time. Instead of manually having to query VirusTotal, Cymon, Shodan and other sources I can now do this with one command.
I primarily use the command line interface and then import the CSV in a central database.

