Phishing alert button
Your users are the first line of defence against threats, especially for what concerns phishing. One of the ways to get more involvement is offering a simple and easy way to report suspicious messages, such as phishing e-mails. You can do this via a phishing alert button that allows users to notify the helpdesk of a suspicious message. The technology behind such a button is straightforward:
- Forward the message;
- Remove the message from the inbox.
Instead of starting from scratch you can use the -free- Phish Alert Button (PAB) from KnowBe4.
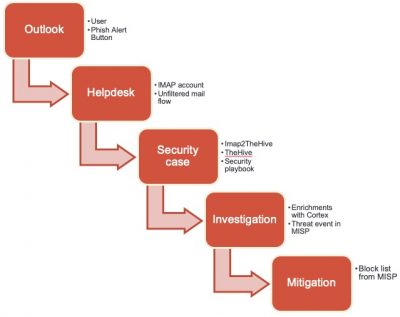
Pipeline to handle phishing e-mails
The pipeline to handle phishing e-mail notifications from users is as follows.
- A user reports a suspicious message via the phish alert button. This button is integrated in Outlook.
- The message is send to the helpdesk. The mail flow to the helpdesk must be unfiltered, in the sense that you do not want your security controls to mangle the message you’re about to investigate. If these controls detect it, that’s good. It means your users are protected (and they shouldn’t have received the message in the first place) but you don’t want to investigate mangled URLs or attachments. Mails for the helpdesk are stored in a dedicated mailbox, accessible via IMAP.
- The mails in that IMAP mailbox are read with a tool from Xavier Mertens: IMAP2TheHive. This tool transforms the phishing e-mail to a security case in the case handling system TheHive. Cases are created according to a phishing handling playbook.
- The investigation is done with the playbook, and automated enrichments of observables is done via Cortex. This enrichment allows your helpdesk staff to investigate if a specific URL in the phishing e-mail is found on a list of known malicious sites, or if an attachment is known at Virustotal.
- From TheHive a threat event is created in MISP. The threat data in MISP is then used to automatically update the block list for the proxy server.
Phish Alert Button (PAB) by KnowBe4 in Outlook
The first step is to create the button. You can use this video as a guide. I did these modifications.
- 1 – Recipient / Helpdesk : the address used to forward the notices;
- 2 – E-mail prefix : the e-mail prefix;
- 3 – Button text : the button text to display in Outlook.
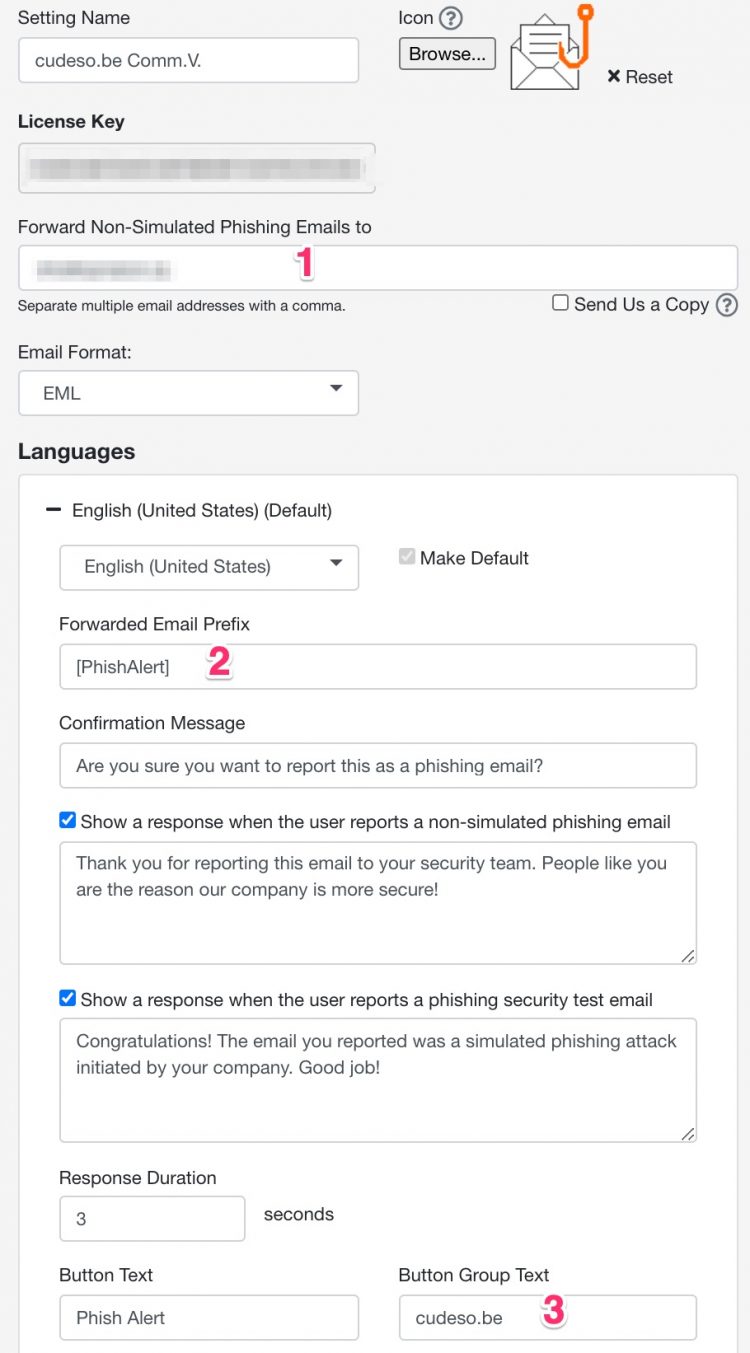
Apart from these settings, there’s really nothing more that you need to configure. If you save your changes you can then download the button as an installable MSI file. After the installation of the MSI and restarting Outlook you’ll notice the button in the Outlook ribbon.

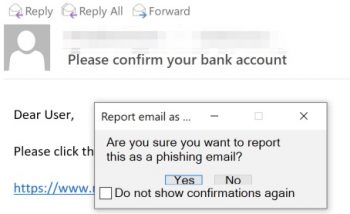
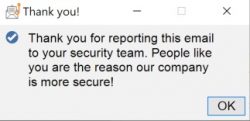
Users can then report a suspicious e-mail by clicking on the button. They are prompted to confirm the action, given a thank you message afterwards and then the e-mail is forwarded to the helpdesk and removed from their inbox.
Case creation in TheHive
The IMAP2TheHive tool from Xavier Mertens does the heavy lifting. This tool reads the IMAP folder that receives the phishing notices and then creates individual security cases in TheHive. These changes have been done to the configuration file.
- the IMAP server address, user and password
- the URL and API for TheHive
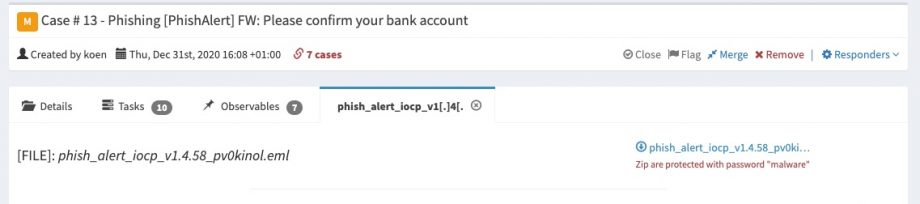
- the case configuration is done with TLP:Amber (2) and according to a phishing template (playbook). An important note. The Phish Alert Button sends the phishing messages as attachments. To make sure that the original phishing e-mail is included in the case verify that the files directive in the script contains application/pdf,application/octet-stream.
- The whitelist is extended with the URLs from w3.org and Microsoft.
[case]
tlp: 2
tags: email
template: Phishing
files: application/pdf,application/octet-stream
I run the IMAP2TheHive script via cron and it’s executed every 15 minutes. Afterwards you’ll see a new case created in TheHive. The new cases contains a number of tasks, which have been defined in the phishing handling playbook.
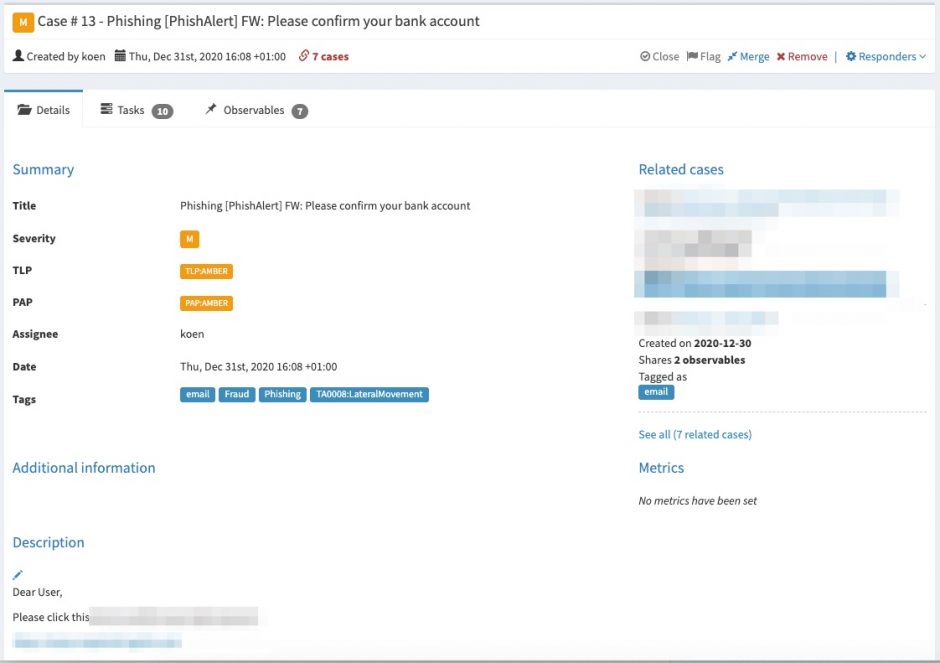
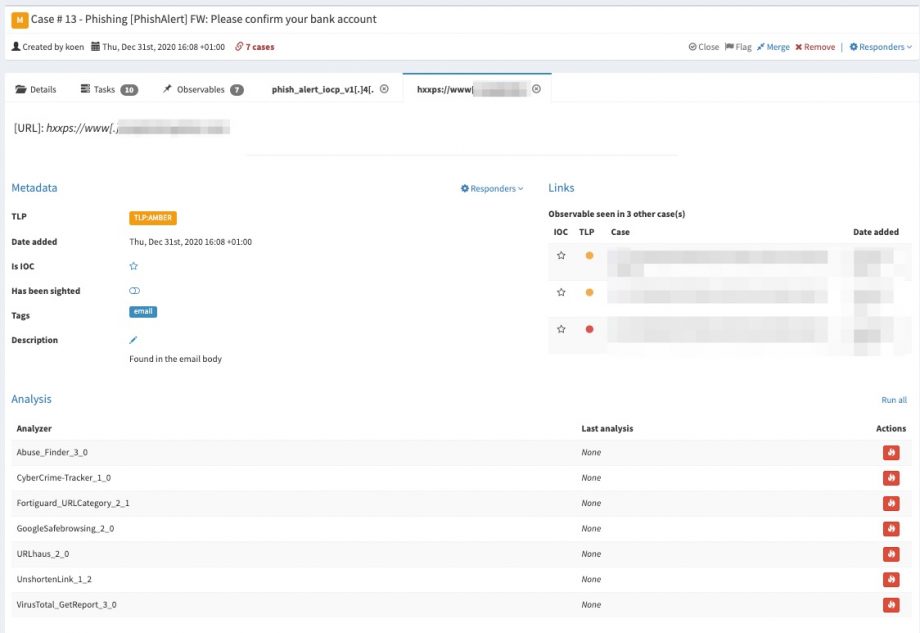
One of the observables in the security case in TheHive contains the original e-mail. This allows the analysts to review for example additional e-mail headers.
The import script automatically extracts useful indicators such as URLs found in the phishing e-mail. You can then use Cortex to verify if these (phishing?) URLs exist with Google SafeBrowsing or if the purpose or goal of these links is known with Virustotal.
Export to MISP and create block lists
I described in another post how to create a block list from data in MISP, see Feed honeypot data to MISP for blocklist and RPZ creation. The integration of MISP with TheHive is explained in detail in a post from TheHive : TheHive, Cortex and MISP: How They All Fit Together.
Happy filtering!

