A walkthrough of Watcher
One of the nice things of working in infosec is that there is always a new tool available to make your work easier. It can also cause a lot of frustration, as there is yet another new tool that you need to master. A tool I recently discovered is Watcher, a platform for discovering new cybersecurity threats targeting your organisation. Some of its key features include
- Detecting emerging trends via social networks and RSS feeds;
- Monitor for information leaks, for example in Pastebin;
- Monitor domains for changes;
- Detect potentially malicious domain names targeting your organisation.
As I’m already using the AIL framework I was interested to see if Watcher is complimentary or could replace AIL. My use case is pretty straightforward. For a number of organisations (in fact keywords relevant for organisation asset descriptions) I want to receive notifications if
- A new certificate is issued;
- The keyword turns up in a phishing database;
- A potential information leak with reference to the keyword was found;
- New domains resembling a keyword are registered (cybersquatting/typosquatting);
I created my own tooling (Digital Footprint Light) for the first two cases and I’m using AIL to cover the third. For the new domains I use dnstwist with manual post-processing. Based on its feature list, Watcher might be an answer to both my third and fourth case. Hence a walkthrough of Watcher.
Getting started with Watcher
Watcher is available as a Docker instance, which makes it very easy to evaluate. Clone the Github directory and make sure you have Docker and Docker Compose installed. Before starting the Docker containers, edit the .env file. This file also allows you to configure the integration with TheHive and MISP.
TZ=timezone
DJANGO_SECRET_KEY=the secret key
ALLOWED_HOST=set this to the FQDN of your server
After these changes you can start the containers with
docker-compose up
If succesfull, create an admin user and populate your database, as described in the installation notes.
Watcher
Monitoring trends
The start page of Watcher presents you a tag-cloud of trending topics. Note that the tag cloud will only contain relevant information after running Watcher for a couple of hours.
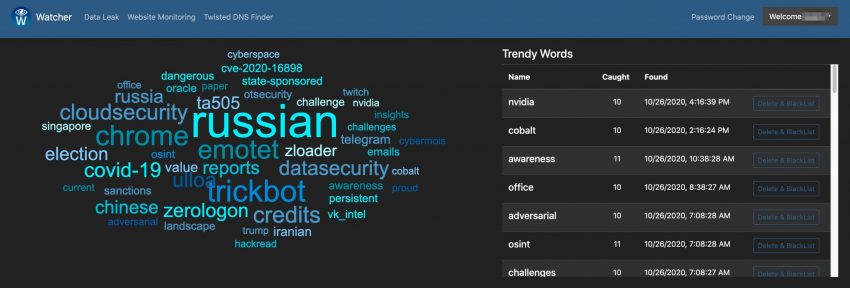
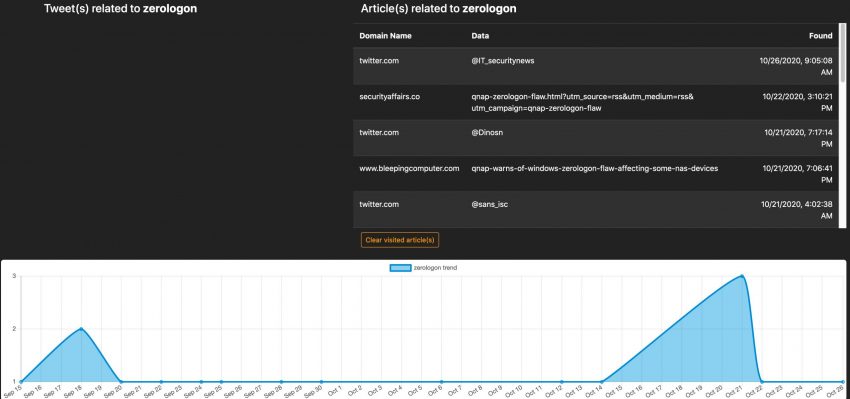
You can then select one of the items in the tag cloud and get a list of articles related to the term, together with a trending graph of the term.
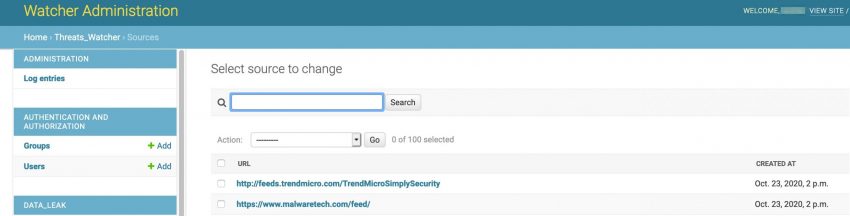
The tag cloud is based on the monitoring of a set of sources, defined in the administration interface.
The tag cloud and user interface for the trend monitoring is very simple and easy to use but the quality of the monitoring entirely depends on the sources that you provide it. This feature can prove very valuable if you want to watch a limited set of websites for new topics, but it’s maybe less useful for a more ‘global’ trend watching. Out of the box Watcher includes more than 100 sources.
Data leak alerts
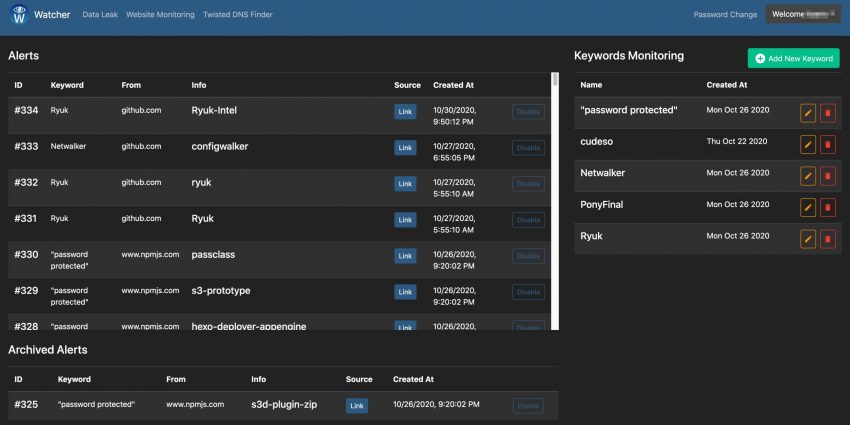
The second option is monitoring for potential data (or information) leaks. You have to provide a number of keywords in which you’re interested and then Watcher will alert you if a hit is found. Apart from the web interface, Watcher can also send you e-mail notifications.
In the background Watcher uses a Docker image of Searx, a privacy-respecting, hackable metasearch engine. The straightforward user interface of Watcher allow you to easily add new terms, but it does not have additional filtering (for example exclude specific combinations). In order to use Watcher Pastebin API feature, you need to subscribe to a Pastebin pro account and whitelist the Watcher public IP.
Website monitoring
The third feature in Watcher is monitoring websites for changes. These changes can either be on the website itself, a change in the IP address or a change in the e-mail records. When you add the website, you can give an RTIR ticket number as reference.
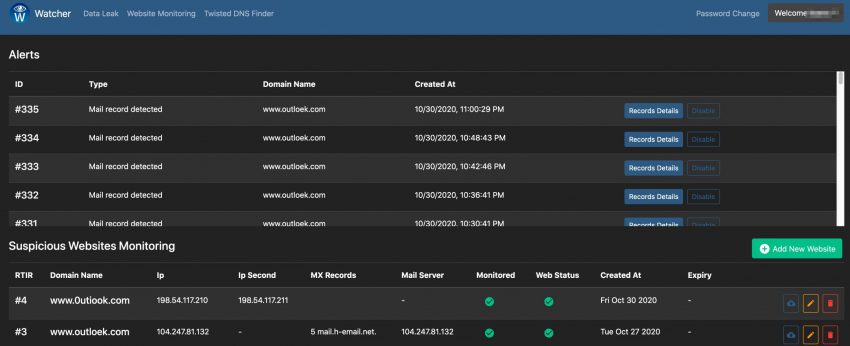
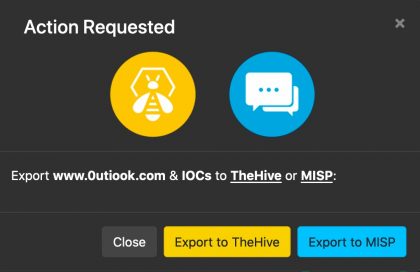
When Watcher has detected a change it supports the option to export the details of that change to either TheHive or MISP.
Dnstwist
The last feature is a graphical layer on top of Dnstwist. Dnstwist allows you to discover permutations of domainnames, ideal to spot cybersquatting. As before, Watcher makes it easy to add new domains to monitor.
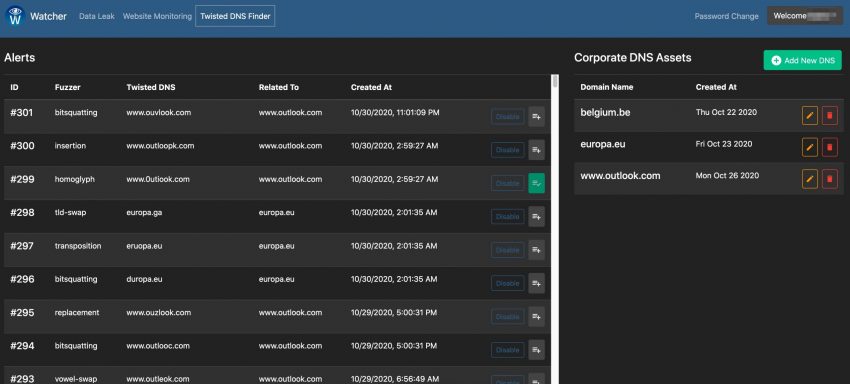
The output of Watcher will indicate the fuzzer, the discovered domain name and the domain to which it relates. A very nice feature is that you can immediately send the discovered domain to the list of websites to monitor. This makes a great chain.
- Dnstwist discover a new potential cybersquatting domain;
- You can then monitor the domain until it gets live;
- And then create a case in TheHive or an event in MISP.
Conclusion
During this walkthrough of watcher, I found the user interface and the ease of use of Watcher very good, it is very easy to add an item you’d like to have monitored. I very much like to web interface around the Dnstwist feature. In some cases having the domain monitored is a very valid solution, in other cases I’d like to report this directly to TheHive/MISP (see: Issue 16). The website monitoring is certainly useful but has room for improvement. For example monitoring changes in the web server environment (see: issue 17) or included libraries would be an interesting addition. Partially this can be covered by integrating with services such as Urlscan.io. And finally, compared to the AIL framework, the leak detection options are limited. This shouldn’t be a problem as such (also see AIL integration) but it still does require running multiple tools.
I’m now primarily using the website monitoring and twisted dns features of Watcher, pending the further integration with the AIL framework.

